Help & Hints
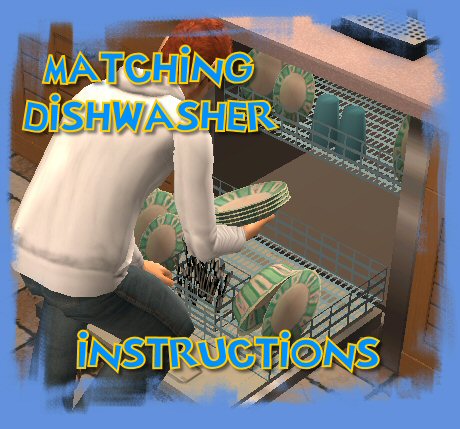
Making matching dishwasher plates for my custom
plates found in hacked objects.
This is for advanced users of SimPE, if you don't
understand these instructions without a lot of help, you probably should
not be messing around editing your game files. Not helping you do so is
not my normal style so I apologize for seeming out of character, but this
is just not one of the beginner hacks that anyone should be attempting. If
you do understand these directions, you're obviously advanced enough using
your SimPE and so that's no problem.
Start by making a backup copy of your Objects06 and 07 packages from
folder: C:\Program Files\EA GAMES\The Sims 2\TSData\Res\Sims3D\ and
put them in a safe place. Note that if you have University, this
file location does NOT change.
Then open your Objects07.package in SimPE and click
Name Map in FileTypes and then click the Plugin TAB and then type "dish"
into Finder box and that will take you to the LIFOs for the default
dishwasher. Copy down the instance numbers (0xFFEAF7E3 & 0xFFDC1CDE) and
then click on Large Image File in FileTypes and paste instances into top
right filter box to get the textures and extract them. Copy paste your
desired custom plate design onto the plate space on the texture and import
it back into the Objects07.package and save it. Now your dishwasher will
match your custom plates close up.
To do further away matching (zoomed out a bit), you'll
have to go into your Objects06.package and use instance filter
0xFF6C3685 and import a 128 size texture and update all sizes and save
that.
To remind you which plate of mine you have (and allow you to set them out
yourself and get your sim to "clean up" so you can watch your plates in
action, hehe) you can get them in Decorative/Misc in buy mode for free.
If you install my plate designs A, B, C and D only D will show up. If you
install A, B and C, only C will show up... get the idea? It will only show
ONE default plate override at any one time, so only have one in your game
folders at a time. Keep your other choices zipped up out of the way
somewhere safe.
To do your own plate designs, just CLONE the plate in Object Workshop
"Others" category and follow up with a matching default dishwasher texture
change in your program files object files.
The NON University instance numbers are:
0x7F451324 - plate
Dishwasher:
0xFFEAF7E3 lifo0
0xFFDC1CDE lifo1
0xFF6C3685 texture
This may have to be updated with new instance numbers every time a new
expansion comes out to work, so I don't guarantee it will work for you
unless you know how to look up the new numbers as needed.
If you found that helpful, please give me a vote and
thanks!
SimPE Photo Studio
Templates
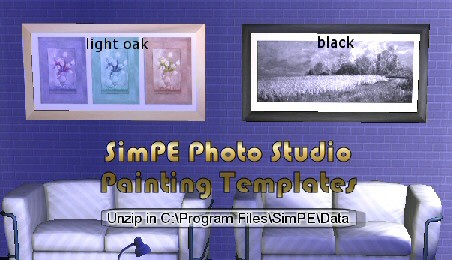
These are included in
SimPE Photo Studio
Templates
Click
*HERE* for install EXE of Template Package
Full Photo Studio tutorial is
HERE.
Wallpaper Templates
3 layers (background wallpaper/wood trim/shadows on top
The making of a quality wallpaper always includes shadows!
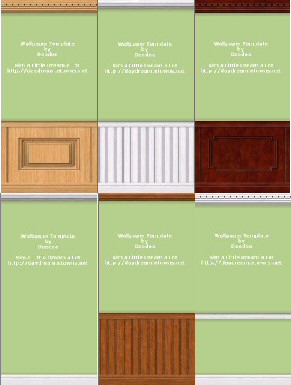
Photoshop 7 Templates
|
PaintShopPro 8 Templates
If you want to use these templates to make wallpapers that you offer
on a website, credit or a link back to me is appreciated, but it is not
required. If you need these templates in PSP7 format, just ask me via
the contact link in
the menu above. If you find these templates
helpful please give me a vote as these votes start over from zero every day!
Game Tips
Re-using Favorite Lots/Housing
Do you have favorite houses you've built or downloaded that you'd
like to use over and over without having to extract the package again and
again? Here's how you can do it: install the lot you want to keep in
the catalog, this places it into your teleport folder. Run the game
and it will be installed into your LotCatalog folder. Without using
the Lot, leave the game and go to your LotCatalog folder and sort by date.
Find the package with the date/time that matches the lot you just
installed and right-click it and mark it Read Only. Now when you
return to the game and use this lot, a copy will remain in the catalog
because the game can't delete Read Only files.
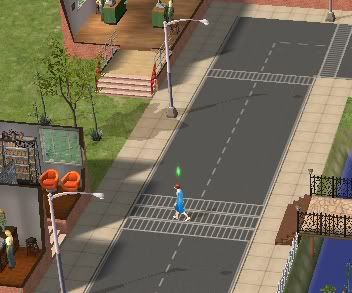
Jaywalking
Tired of your sims avoiding walking on the roads of your
mini villages and shopping centers? If you've unlocked the extra
floor tiles in your game, use the crosswalk floor tile and they WILL walk
across anywhere that leads them to in their route. No more annoying
walking clear to the other end of the lot just to stay on the sidewalk!
If you haven't got road and crosswalk floors unlocked in your game
(showing in the catalogue) open a file called floorPatterns.txt
which is located in your C:\Program Files\EA GAMES\The Sims 2\TSData\Res\Catalog\Scripts
folder and locate the road and crosswalk floors. Put a #
in front of every instance of "notInCatalog" so it says #notInCatalog and
then save the txt file and run the game and look for your crosswalk
floors under All (infinity symbol.) Note they have directions and
endcaps that blend into the side of the road or parkinglot.
Once you've got one built right your simmies will gladly use it to cross
any roads or parking lots.
Saving Viewpoints
You know how you do the CTRL+[4-9] to save the viewpoints?
Well did you ever wish you could have a few more saved? You can!
Hit your TAB key and go into "freestyle" mode and you get six more to save
with or without F10 controls showing or whatever you want!
Screenshot Tip
Want to take screenshots without the grid showing on a property
nobody lives on?
Simply click the exit property 3 dots (...) and the grid disappears.
No need to go
into build mode to the terrain tool and deal with it showing or other
methods you may have heard of. You can still use F10 to remove the
player interface too.
Bookcases
Don't want a big tall bookcase taking up valuable screen
room and blocking your view? Get a book off the bookcase and while
your sims has it, direct them to do something else. If they put the
book down on the table or floor, you can delete the bookcase and then
you'll just have the book all the time instead! If your sims are too
neat to leave it out, try putting the bookcase somewhere they can't return
the book to so you can get it down on a surface before you delete the
bookcase.
Can't place your
driveway?
Chances are if you know how to place a driveway and
suddenly can't, you've accidentally left MOVEOBJECTS cheat ON. Turn
it back off and the driveway will go down for you.
Making Collections
Collections are great for organizing your downloads into groups of
similar things. To make your own custom collections, when you're in
Buy Mode and an object is selected, you'll see a folder to the right and
you just click that to add any object to a collection.
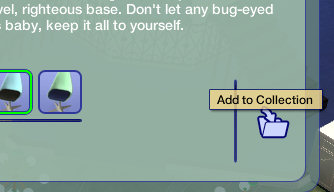
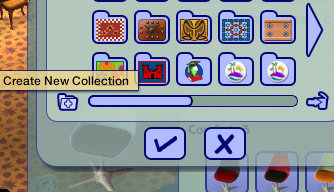
Next you will be asked which collection to add the object
to. Here is your chance to make your own. Create New
Collection (little folder with plus sign on it) is seen here on the left
and to delete a collection you no longer want, there's a button on the
right depicting a little trash can.
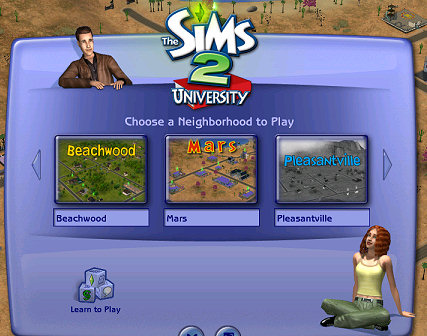
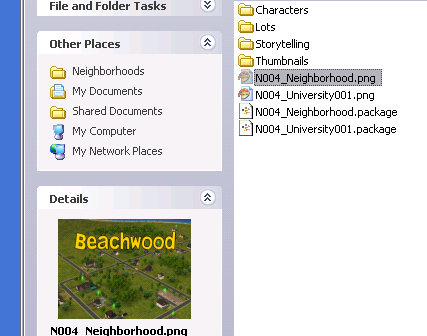
Custom Neighborhood Pictures
It's very easy to make your own custom neighborhood pics to choose
your neighborhood from, and quite satisfying too as they're a nice
improvement over the default ones you get. This is the UNI method, I
can't remember if the location of the neighborhood pic was different in
the basic game or not, but if you look around for it, now that you know
the name of it, shouldn't be too hard.
My first custom neighborhood number is 4 (because 1-3 are
Maxis ones) so you just go into this folder:
C:\My Documents\EA Games\The Sims 2\Neighborhoods\N004
And locate the pic file: N004_Neighborhood.png and
make it anything you want. You can also customize the UNI pic shown
for this hood as well. I'm sure this will continue for any EP.
Template Explanations
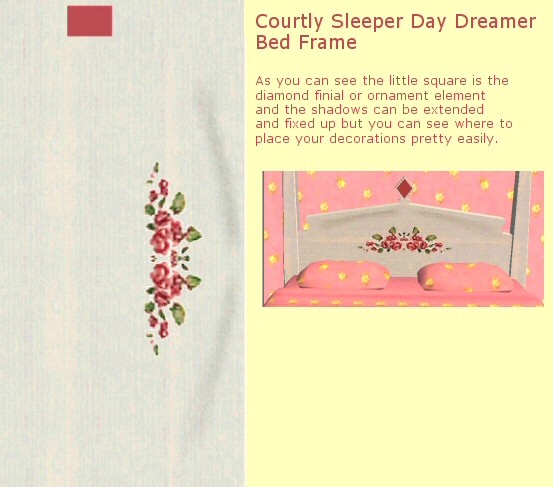
Courtly Sleeper Day Dreamer Bed Frame Template Explanation
I've seen bed recolours out there that prove that people have WAY
BETTER templates than this... I just hope they share them!
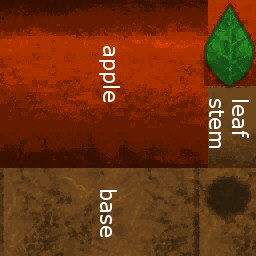
Apple Sculpture template layout
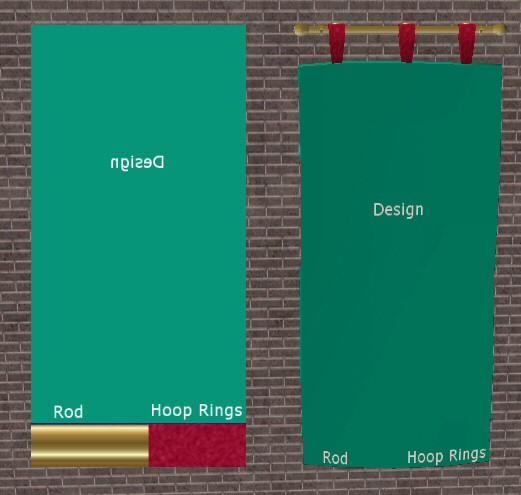
Tapestry Template Explanation
Shaklin's Elevator

click to enlarge
Help in English seems to be needed for this. I know I
needed it, so when I figured it out I thought I'd share it in case I
wasn't alone. Get elevator on Shaklin's Sims 2 page
HERE.
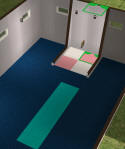
In picture one (click to enlarge) you can see I've pointed the green
placement arrow towards the back away from the door into the 2x2 square
that will serve as my elevator shaft. This will take a sim up one floor as
long as you remember the door on both floors.
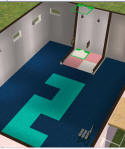
In picture 2 you can see how things look in multiple floor elevators
(buildings with more than 2 stories) the control you can see on the right
is for floors 1-2 and the one on the left is for 2-3. The control that got
sims to this floor is on the right but to go up another floor you place
one, again with the placement arrow pointing to the back of the elevator
shaft, on the left side.
Now in picture 3 you can see just the top of the 2nd floor's control
because I stopped at 3 but it alternates like that back and forth in
multiple story buildings and the top and bottom can just be the one each
because they're the end of the line.
So all I've done is built the 2x2 box and put the doors and flooring in and then just
place the controllers making sure to point to the back and alternate back
and forth on multiple story buildings. Sims2 doesn't have "use stairs" in
the code so to test your elevator, click GO HERE on another floor and
that'll get them to either use it or drop it from the queue because
something is not right. If you keep having it drop from the queue let me
know as that means something is still confusing. I am not saying this is
the ONLY way to do this but it's how I do it and it works for me.
Not that you HAVE to build the 2x2 box anyways, you could just build a 2
story building and put your floors in and then go to the first floor and
put in one elevator controller and ask a sim to GO HERE upstairs and it'll
work. All the 2x2 box and doors, etc. are really so in multiple
story buildings you have an elevator shaft that looks realistic and it
also helps line up the look of it from floor to floor so you can go back
and forth easily.
Please use the contact link in the menu above to
let me know if this worked for you or if I should explain it better
because it didn't work. If I can do anything to make it easier to
understand, just let me know!
UserStartup.cheat
This is a file you can get out of the
Program Files\EA GAMES\The Sims 2\Config
folder and edit it and then place your personal version of it into the
My Documents\EA GAMES\The Sims 2\Config
folder so that it takes precedence over the original until you delete
it. If you've placed a UserStartup.cheat file into your My Documents
config folder and your cheat shortcuts aren't working in your
CTRL+SHFT+C command box, you may have accidentally put a .txt or .doc
extension onto the cheat file when resaving it. To avoid doing so
in the future, save it as filename "userStartup.cheat" WITH THE QUOTES
and that will avoid it adding the editor specific extension to the file
name.
You may not be able to see file extensions
in the config folder because Windows normally defaults to hiding them,
in which case it's quite possible to have a file
named
UserStartup.cheat.txt
But with extensions turned off it looks like this, so you wouldn't know
it:
UserStartup.cheat

So in a case like that you wouldn't really see the actual
file extension at all, but as I can see the other file's extensions as
well as the .cheat one in this example, I know that my folder is set
right. Can you see your .ini and .xml file extensions in your
Config folder?
If you can't, it's best to turn them on to avoid future confusion.
Just go into File Manager's TOOLS menu and then into Folder Options to
change it. I ALWAYS keep file extensions turned ON because the
added "clean" look you get when turning them off is simply not worth the
occasional bad confusion that ensues when you can't see them...
especially in the case of files with multiple dots in the name, which
personally I don't see why that was even implimented.
To view my personal UserStartup.cheat file, click
here.
To download it and use it in your My Documents\Config folder, simply
right-clicks SAVE TARGET AS or SAVE LINK AS or however your browser
words it, to get a copy on your computer.
|